Start Smart: What a Dremel Can Do for You
I’ll guide you through Dremel basics — carving, sanding, and polishing — so you can confidently finish small woodworking, jewelry, and home‑decor projects. I emphasize safety, simple techniques, and creative finishing tips to turn blank material into proud, display-ready finished pieces quickly.
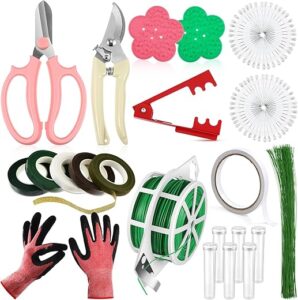
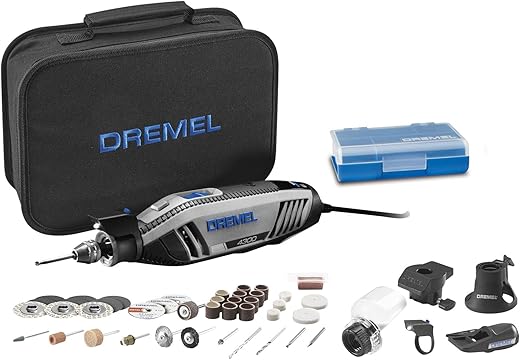
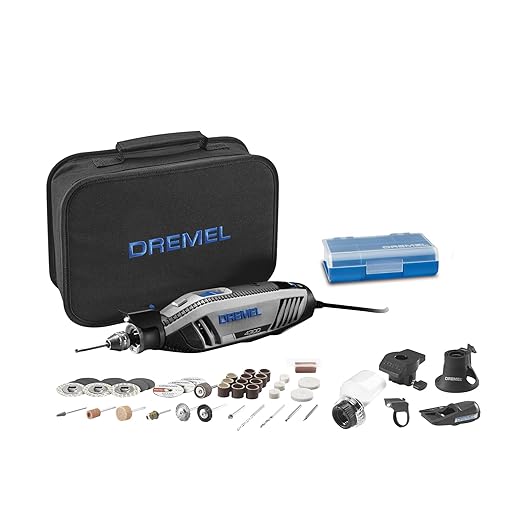
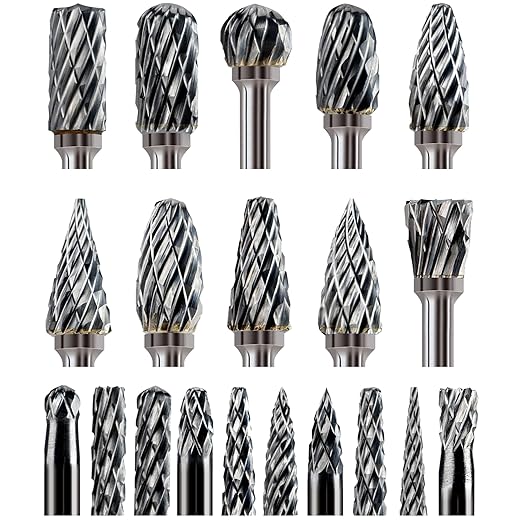
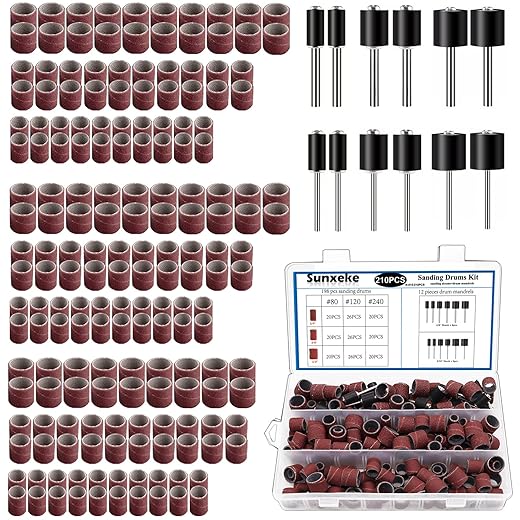
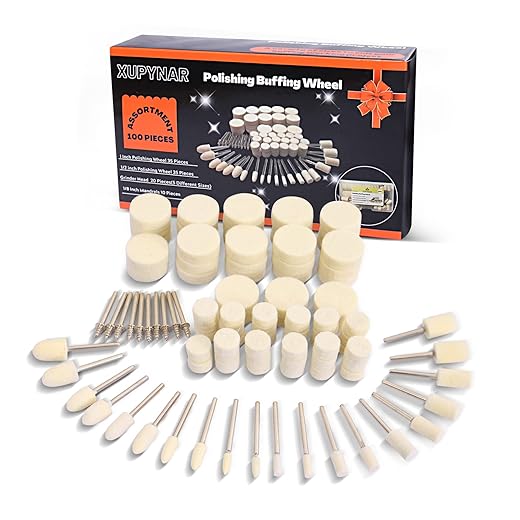
What I Use and Recommend
I use:
Step 1 — Set Up and Stay Safe
Did I just avoid a ruined project? My setup routine prevents mistakes and keeps my fingers intact.Set up a stable workspace. I begin every project by securing a flat, sturdy bench at a comfortable height and clamping the piece so it won’t move.
Make your workspace safe and efficient:
Test your setup on scrap before the real cut. For example, I test a carving bit on a scrap pine offcut to confirm speed and feel — it saves ruined pieces and time.
I begin every project by setting up a stable workspace. I clamp the piece so it won’t move, position good lighting, and clear dust paths. I always put on safety glasses and a dust mask, and I keep loose clothing and long hair away. I check the Dremel’s collet is tight and choose a slower speed for delicate materials, higher for hardwood or metal. I test the bit on scrap to confirm speed and handling. My rule: measure twice, clamp once, and don’t rush the first cut.

Step 2 — Choose the Right Bit and Start Carving
Why I pick one bit over another — and how the right choice feels like a superpower.Sort bits by task — I use the right cutter for the right job. Use high‑speed cutters (fluted bits) for general shaping and soft woods. Choose carbide bits for hard woods and plastics. Prefer diamond or diamond‑coated bits for glass, ceramics, or metal.
Mark your design on the workpiece and remove material in light passes. Hold the Dremel like a pencil for control and let the tool do the work — guide, don’t force. Make multiple shallow passes for relief cuts or deep grooves, and clean dust between passes so you can see progress. Watch for burning or grabbing; stop and change bits or slow the speed if you feel heat. Finish carved areas with small files to refine curves and crisp details.
Step 3 — Sand Smooth: From Rough to Refined
I can make something gritty feel silk‑smooth — here’s the sanding secret I rely on.Start with a coarser drum or 120 grit to remove tool marks; I then step to 220, 320, and up to 600 for a silky feel. Work in light, even passes and check your progress often.
Keep the Dremel moving—guide the tool like a pencil and let it skim the surface. Switch to finer grits between passes to remove scratches from the previous grit.
Switch to small sanding drums or abrasive points for tight curves; I use the dowel trick on spoon bowls and carved letters for consistent contact. Apply very light pressure on resin and finish resin pieces with wet sanding to eliminate micro‑scratches.
I always wipe away dust and inspect under good light before polishing.
Step 4 — Polish and Finish Like a Pro
I promise a shiny finish doesn’t require a miracle—just the right pads, compounds, and timing.Attach a felt or soft cloth wheel and secure the piece. Apply a small bead of polishing compound to the wheel and run the Dremel at moderate speed. Work the tool across the surface in light, overlapping passes.
Work from lower to higher compound grades. For oil finishes, rub on a thin coat of finish and buff to depth to bring out the grain. For lacquered pieces, use ultra‑fine polishing to remove haze and avoid burning the surface. Use examples like polishing brass knobs to a bright shine or buffing a resin pendant to a glossy finish.
Use a slow speed and patience—overheating will ruin a finish faster than anything else.
Step 5 — Projects, Tricks, and Troubleshooting
I’ve saved time with these clever hacks — and I’ll show how I recover from common slip-ups.Make small projects I love: earring charms from scrap metal or resin, carved wooden spoons, and tiny inlay accents for boxes. I start simple and scale complexity as my confidence grows.
Use these quick tricks to save time and prevent mistakes:
Sand back slightly and restain if I scorch wood; the damage is usually shallow. Reduce speed and take lighter passes if a bit grabs; a firmer grip and slower feed stops many snags. Check the collet for wear or replace the bit when wobble shows — loose collets cause most runout. Clean vents and the spindle regularly to prolong the motor. Organize bits in a labeled tray so I don’t waste time hunting the right accessory.
Finish with Confidence
I encourage you to practice these steps on scrap, build a small project, and celebrate small wins; with proper setup, the right bits, patient sanding, and careful polishing, I guarantee your Dremel projects will level up fast — ready to try?