Let’s Build a Pallet Shelf Simple, Cheap, and Proudly Handmade
Here’s a simple practical step by step method to turn reclaimed pallets into a sturdy shelf. Shocking fact a single pallet can safely hold over 1,500 pounds. No fancy skills needed just basic tools patience and some sawdust pride.
What You’ll Need
You’ll need one pallet or reclaimed boards measuring tape, saw, drill, screws, sandpaper wood glue, finish or paint, gloves and mask optional brackets/casters; basic DIY skills and flat workspace.
Pick the Right Pallet and Prep It
Not all pallets are created equal — here’s how to pick the safe, straight ones (and ditch the junk).
Find a pallet that’s solid, straight, and stamped HT (heat-treated). Avoid pallets with chemical stamps, heavy stains, or obvious rot. Find ones with long, intact boards to minimize joints.
Look for: solid stringers, an HT stamp, long boards, no chemical markings, no soft/rotten wood.
Remove loose nails and replace any bent ones; tap nails flush or pull and swap them for new galvanized nails or screws. Clean the surface with a stiff brush and mild detergent…scrub, rinse, and let dry completely.
Pull boards carefully with a pry bar and, if needed, a reciprocating saw to cut nails; work slowly to avoid splitting the boards. Wear gloves and a dust mask the whole time and eye protection when cutting or prying. Check each board for hidden damage and set aside anything with deep rot or contamination.
Prepare this way to keep the shelf safe and extend its life. A good cleanup here saves headaches later.
Design and Measure Your Shelf
Thinking small? Think smart…plan dimensions to match my space and the stuff you’ll actually store.
Measure the wall or corner where the shelf will live and note width, height, and depth.
Decide on total height, depth, and number of shelves based on what you’ll store.
Depth guidance: 10–12″ for books/decor, 12–16″ for pantry or bulky items.
Shelf spacing: 10–12″ between shelves for books, 14–18″ for taller items.
Sketch a simple plan showing overall dimensions and each shelf location.
Mark the pallet boards for cuts, including allowances for board thickness and joinery.
Plan a stable base if the shelf will be freestanding; add a wider bottom shelf or feet for balance.
Locate studs with a stud finder if wall-mounted and choose appropriate anchors or toggle bolts.
Calculate weight per shelf and pick thicker screws and extra brackets for heavy items.
List required pieces for each shelf level (boards, risers, brackets) and jot decorative ideas like staggered heights or a reclaimed wood back panel.
Cut, Sand, and Treat the Wood
Power tools + patience = surprisingly refined results — you’ll be amazed what a little sanding does.
Cut boards to length with a circular saw or miter saw, and clamp pieces to keep them steady. Be sure to double‑check that crosspieces have perfectly square cuts so each shelf will sit level.
Sand all surfaces starting with 80 grit to knock down splinters, then move to 120–150 grit for a smooth feel. If you want a modern finish, sand to 220 grit; if you prefer rustic, leave a few tool marks for character. Always sand along the grain and wipe dust between grits.
Treat the wood to protect it and bring out the grain. Use Danish oil or a clear sealer for indoor shelves; use stain or paint if you want a different color. For outdoor shelves, apply an exterior‑grade sealant.
Grit progression: 80 → 120–150 → optional 220
Allow adequate drying time between coats and lightly sand between coats for a professional result. Treating now prolongs the shelf’s life and reduces future maintenance.
Assemble the Shelf Frame and Attach Boards
Strong, well-made joints are essential for sturdy shelves that can hold books and plants without sagging.
Begin by building the frame. Lay out two side uprights and the horizontal supports at each shelf level. Apply wood glue at each joint and secure with 2.5 to 3-inch screws for durable connections. Predrill holes to prevent splitting.
Use pocket holes if a jig is available, as they conceal fasteners and create tight joints. If not, drive screws from the outside into the supports. Clamp each assembly square while the glue dries, and measure diagonals to ensure accurate right angles.
Before final tightening, confirm the structure is square using a spirit level. Attach the shelf boards to the supports with shorter screws or a brad nailer, spacing the boards evenly and leaving a small gap of about 1/16 to 1/8 inch for wood expansion.
Add a center support or metal bracket under longer shelves for extra stiffness. If making a leaning shelf, angle the back uprights slightly and fit non‑slip pads at the base. Check level again and tighten everything securely before moving on.
Finish, Mount, and Style Your Pallet Shelf
Mounting a shelf securely and styling it thoughtfully ensures both safety and visual appeal.
Begin by deciding on the mounting method. Locate wall studs with a detector and mark attachment points. For strong, level support, use lag screws through a timber cleat or a French cleat system. Attach a 1×4 cleat directly to the studs, then hang the matching shelf cleat over it for a reliable connection.
When studs are not available, use heavy-duty drywall anchors rated for the shelf’s load capacity. Select anchors that match the expected weight and follow the manufacturer’s torque instructions carefully.
For freestanding shelves, improve stability with leveling feet on uneven floors or lockable casters if mobility is needed. Long shelves benefit from a center support or metal bracket to prevent sagging.
After installation, conceal screw heads with wood filler, sand smooth, and apply matching stain or paint for a polished finish.
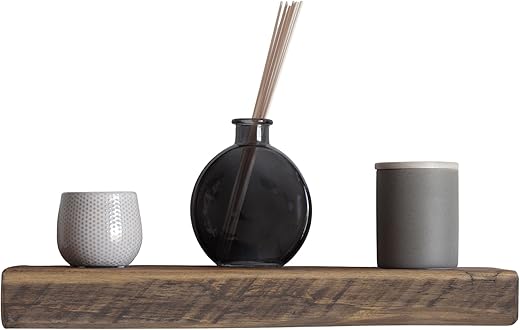
When styling, balance weight and color by mixing books, baskets, and plants. In kitchen spaces, add labeled jars or small hooks for utensils to create a look that is both practical and attractive.
Finally, re-tighten screws after several weeks of use and refresh the finish once a year to maintain strength and appearance.
You Did It! Enjoy Your Handmade Shelf
I hope this simple pallet shelf guide inspired you. Building from recycled wood is practical, budget-friendly, and rewarding. Tweak the steps, add your personality, then snap photos and share your finished shelf with the DIY community to inspire others today.