Versatile, budget-friendly airbrushing for models, cakes, and makeup
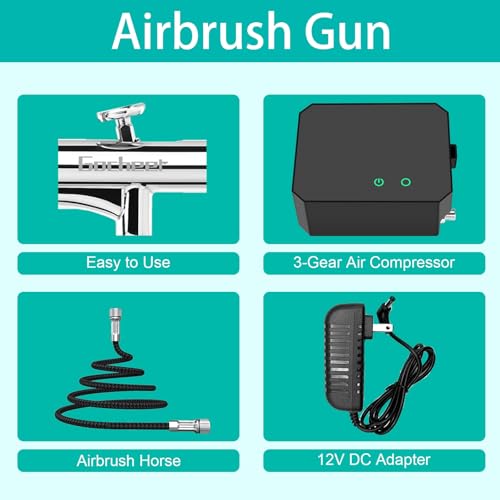
Tired of brush marks, uneven coverage, or gadgets that promise pro results but cost an arm and a leg? I was — until I tried the Gocheer Airbrush Kit. It delivers a surprisingly steady 40 PSI spray, three nozzle sizes, and a full cleaning set that make smooth finishes achievable without blowing your budget.
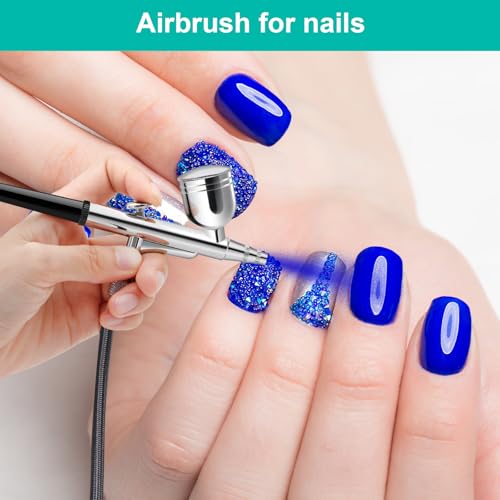
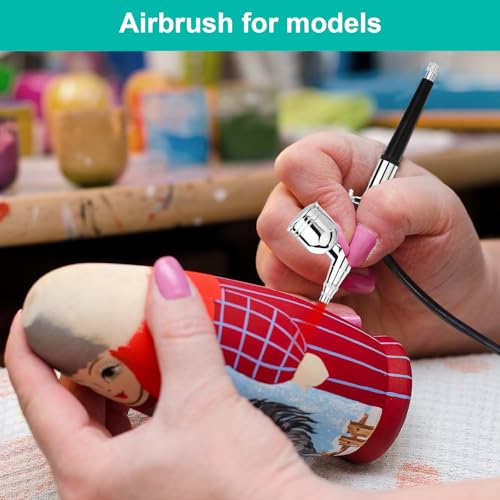
I found this kit is great for model painting, cake decoration, and practice makeup work: the dual-action airbrush gives real control, and the 0.2/0.3/0.5 mm nozzles mean you can switch between fine detail and broader coverage. A quick tip from my tests: thin your paints, practice on scrap, and use the oil-water separator and cleaning tools regularly — you’ll avoid clogs and get cleaner lines. Just be aware the compressor hums and a tiny number of units may need a minor alignment tweak.
Gocheer 40PSI Airbrush Kit

I found this kit delivers professional-feeling results without a big investment. It’s excellent for models, cake decorating, and practice makeup work, though the compressor can be audible and a tiny fraction of units may need minor adjustment.
My hands-on take: who this kit is for
I bought this airbrush kit to step up my hobby painting and to try cake decorating techniques without renting time in a professional studio. In my experience, the set is aimed at DIY crafters, model-makers, bakers who want clean color blends, and makeup artists testing airbrush foundations on a budget. It blends high-pressure performance with a compact compressor that lives happily on my workbench.
What’s included and why it matters
The package is thoughtful for beginners: you get interchangeable nozzles for detail and coverage, plus the cleaning tools you actually need to avoid clogs. The oil-water separator helps protect the airbrush from moisture — a small but useful inclusion.
Key features I rely on
I particularly liked the dual-action trigger. It lets me feather amounts of paint on tiny model panels, then shift to a more open spray for background shading without swapping tools.

Quick reference: nozzle and pressure guide
| Nozzle | Best use case | My notes |
|---|---|---|
| 0.2 mm | Ultra-fine detail (miniatures, fine lines) | Use thinned paint and lower pressure for crisp lines |
| 0.3 mm | General-purpose detail and small areas | Great for most model parts and nail art |
| 0.5 mm | Larger coverage, base coats, cake backgrounds | Runs a little thicker paints well at higher PSI |
This table helped me pick combinations when switching projects — 0.2 mm plus 25–30 PSI for tiny details, 0.5 mm at 40 PSI for backgrounds.
Setup and first-run checklist (what I do)
Following those steps, I had a trouble-free first session within five minutes of opening the box.
Real-world performance: projects I tried
Across these uses the compressor delivered steady pressure and the trigger offered precise control. I did notice the compressor hum during longer runs, so I keep projects in bursts or in a ventilated hobby space.
Cleaning, maintenance, and longevity
A consistent cleaning routine keeps the needle and nozzles functioning smoothly. I found the included tools make routine maintenance straightforward, and I haven’t needed extra spares beyond common consumables.
Troubleshooting tips I use (short, actionable)
One of the user reports mentioned a misaligned air hole; in my unit I avoided that by confirming concentric seating during assembly and testing before paint.
Practical suggestions and creative projects I recommend
These habits saved me paint, reduced cleanups, and improved final finishes quickly.
Who should buy this, and who should look elsewhere
Buy this if you are a hobbyist, cake decorator, or makeup artist seeking an affordable, capable starter system that includes the accessories you need to get going. The balance of pressure, nozzle choices, and cleaning supplies makes it a strong value.
If you need an industrial-grade, silent compressor for nonstop professional production, look to pro-level systems with larger tanks and soundproofing.
Final thoughts from my bench
I enjoy using this kit because it reliably expands what I can do at home — from sharper model panels to smooth cake shading and experimental makeup looks. It’s not perfect, but for the price and included accessories it’s a versatile, user-friendly package that helped me push my hobby projects to the next level.
FAQ
Yes — you can use food-grade colorants thinned appropriately with water or an approved solvent. I always test on parchment first and clean the airbrush thoroughly after edible use to avoid cross-contamination with non-food projects.
Thin, water-based acrylics or dedicated airbrush paints work best. For 0.2 mm go thinner for fine detail; 0.5 mm accepts slightly thicker mixes for base coats. Avoid paints with large pigments or too viscous blends unless you thin them.
The compressor has a steady hum that’s noticeable in quiet rooms. Placing it on a foam mat, using a small acoustic enclosure with ventilation, or running short bursts rather than continuous operation helps reduce perceived noise.
It can handle small to medium fabric projects; use textile paints thinned to the right viscosity and secure the fabric flat. For full shirt coverage or professional garment production, a larger system may be more efficient.
Flush and clean the nozzle and needle, check for paint buildup on the tip, ensure the nozzle is seated correctly, and verify the hose and fittings for leaks. Small adjustments usually restore a consistent pattern.